This is the first in a series, of unknown length, of posts detailing, I hope, the process I went through, the people that helped, the software we tried, what failed and why, what we software used in the end, the game mechanics and the iterations of these that all came together to create both Mini Melbourne and Archaeology Adventure. If you haven't seen Mini Melbourne, or the Archaeology Adventure... I would ask what rock you have been living under, but that could be rude, so I suggest you check out this promo video showing what it is. (EDIT: Apparently the embed has stopped working, so here is the link: https://fuse.education.vic.gov.au/Resource/ByPin?Pin=8WB7CM&SearchScope=All
Funnily enough, even though the title of this post says Mini Melbourne Step 1, it didn't really start as a project to recreate such a large portion of a city in Minecraft. It started with a question, can we, two completely separate government departments, create a piece of content for Minecraft and make it really, solidly educational and suitable not only to both departments, but also to a wide range of schools, students and subject areas?
The idea for the project, out of the three that were coined in preliminary emails, that held the most interest of the team, but oddly enough my 'least favourite' was the idea of students performing an archaeological dig. If I am being honest, and I like to think I normally am, at the time I thought they were trying to make their ideas fit Minecraft, rather than making Minecraft fit their ideas, but as always, I went into the meeting with an open mind and, well.....
I was totally wrong of course... I had no idea prior to our initial face to face meeting that there were actual archaeological digs happening a block away from me right then, as we were in discussions about this project, and those archaeological digs would be the factual basis of this whole experience. Not only making this a highly immersive experience, but an authentic one, based on real events of real sites and real people and community from our city's history.
So, after our initial meeting, it was decided the first project we would work on would be what would become Archaeology Adventure, or the 'Dig Experience' as it was called for much of its development internally. So I took the idea and started playing around with the mechanics I knew of that might support this kind of thing. I also had to explore some mechanics and make them up as I went, which has been one amazing side effect of working on this project, I have learnt so much, and I hope to share as much of it as I can, by starting at the start and taking you on a journey to the finished product, both through this series of blog posts, but also through a YouTube video series that goes more in depth about each mechanic than I could possibly do here and keep your attention!
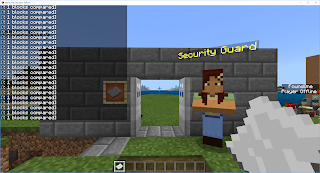
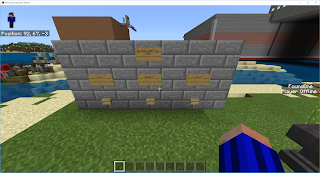
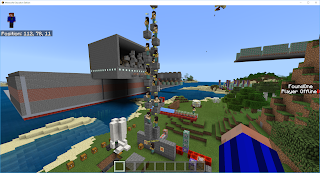
Anyway, back on topic! I created a quick and dirty mockup of how I expected a dig might work to show the team. That constituted the following basic mechanics;
A security pass, and check in system to actually get onto the site.
The raw and rough mechanics for randomly 'finding' items in a given area.
A way for students to choose how fast they would dig.
A way to 'uncover' what the found artefact was (analyse it) rather than just 'know' it straight away.
And, finally, a way to provide students with the information about each artefact that could support them in their goal of determining what the site was used for in the past.
Of course much of this, 'mechanically' speaking, has changed considerably over the development period, but the fundamental basis of it all is still there in some way, shape or form. I think the only things that have pretty much remained 'mechanically' the same is the security pass and check in and the analysis of items. But, this 'pre-alpha' demonstration set the scene (or at least the base of the possible scene) for what we could achieve in Minecraft for a room full of people who had never played before and really had no idea about what was possible.
With the 'raw' mechanics at least visible and planned out on a small scale, it was time to look at getting the data for Mini Melbourne itself, and that, my friends, is the topic of the Mini Melbourne Step 2 post. While you are waiting, I am sure with eager anticipation for that 'mouse scroller' (Is that the internet equivalent of a page turner?) to arrive, keep an eye on my YouTube channel for the video outlining each of these first mechanics, the reasoning and commands that make them work, and maybe even why I thought they were a good idea at the time.
As always, thanks for reading, and if you have any comments or questions, please feel free to leave them in the comments below, touch base on Twitter @EduElfie or even join our Discord: https://discord.gg/7fSQBdx.
Funnily enough, even though the title of this post says Mini Melbourne Step 1, it didn't really start as a project to recreate such a large portion of a city in Minecraft. It started with a question, can we, two completely separate government departments, create a piece of content for Minecraft and make it really, solidly educational and suitable not only to both departments, but also to a wide range of schools, students and subject areas?
The idea for the project, out of the three that were coined in preliminary emails, that held the most interest of the team, but oddly enough my 'least favourite' was the idea of students performing an archaeological dig. If I am being honest, and I like to think I normally am, at the time I thought they were trying to make their ideas fit Minecraft, rather than making Minecraft fit their ideas, but as always, I went into the meeting with an open mind and, well.....
I was totally wrong of course... I had no idea prior to our initial face to face meeting that there were actual archaeological digs happening a block away from me right then, as we were in discussions about this project, and those archaeological digs would be the factual basis of this whole experience. Not only making this a highly immersive experience, but an authentic one, based on real events of real sites and real people and community from our city's history.
So, after our initial meeting, it was decided the first project we would work on would be what would become Archaeology Adventure, or the 'Dig Experience' as it was called for much of its development internally. So I took the idea and started playing around with the mechanics I knew of that might support this kind of thing. I also had to explore some mechanics and make them up as I went, which has been one amazing side effect of working on this project, I have learnt so much, and I hope to share as much of it as I can, by starting at the start and taking you on a journey to the finished product, both through this series of blog posts, but also through a YouTube video series that goes more in depth about each mechanic than I could possibly do here and keep your attention!
Anyway, back on topic! I created a quick and dirty mockup of how I expected a dig might work to show the team. That constituted the following basic mechanics;
A security pass, and check in system to actually get onto the site.
A way for students to choose how fast they would dig.
A way to 'uncover' what the found artefact was (analyse it) rather than just 'know' it straight away.
And, finally, a way to provide students with the information about each artefact that could support them in their goal of determining what the site was used for in the past.
Of course much of this, 'mechanically' speaking, has changed considerably over the development period, but the fundamental basis of it all is still there in some way, shape or form. I think the only things that have pretty much remained 'mechanically' the same is the security pass and check in and the analysis of items. But, this 'pre-alpha' demonstration set the scene (or at least the base of the possible scene) for what we could achieve in Minecraft for a room full of people who had never played before and really had no idea about what was possible.
With the 'raw' mechanics at least visible and planned out on a small scale, it was time to look at getting the data for Mini Melbourne itself, and that, my friends, is the topic of the Mini Melbourne Step 2 post. While you are waiting, I am sure with eager anticipation for that 'mouse scroller' (Is that the internet equivalent of a page turner?) to arrive, keep an eye on my YouTube channel for the video outlining each of these first mechanics, the reasoning and commands that make them work, and maybe even why I thought they were a good idea at the time.
As always, thanks for reading, and if you have any comments or questions, please feel free to leave them in the comments below, touch base on Twitter @EduElfie or even join our Discord: https://discord.gg/7fSQBdx.


No comments:
Post a Comment